- Cat breeding requires FeLV and FIV testing, breed-specific genetic screening, and a queen who is at least 10 to 15 months old
- Cats are induced ovulators that need multiple matings to trigger ovulation
- Pregnancy lasts 63 to 65 days
- Kittens must nurse colostrum within the first 2 hours of birth and begin weaning at 3 to 4 weeks
- Responsible cat breeding starts with preparation, not just pairing
Cats can get pregnant as young as 4 months old, long before their bodies are ready for a safe pregnancy. That’s why understanding the full cat breeding process is critical before you pair your first queen and tom.
Breeding cats responsibly means more than putting two cats together and waiting. It involves health testing, understanding feline reproductive cycles, preparing for birth, and caring for fragile newborn kittens through their first weeks of life. Skip any of these steps and you risk the health of both the mother and her litter.
This guide covers everything you need to know about cat breeding on PairMyPet, from deciding whether breeding is right for you, through mating and pregnancy, to weaning and finding homes for kittens. Whether you’re considering your first litter or looking to improve your breeding program, this is your complete roadmap.
The Cat Breeding Journey
Six essential stages from preparation to rehoming
Is Cat Breeding Right for You?
Cat breeding is right for you if you can commit to comprehensive health testing, ongoing veterinary care, a safe birthing environment, and finding responsible homes for every kitten. It requires significant time, financial investment (expect $1,500 to $3,000+ per litter in vet costs alone), and genuine knowledge of feline genetics and reproduction.
Before your first litter, ask yourself these questions honestly:
- Can you afford emergency veterinary care if complications arise during birth?
- Do you have space for a dedicated queening area away from household noise?
- Are you prepared to hand-feed kittens every 2 hours if the mother can’t nurse?
- Do you have a plan to find responsible, vetted homes for every kitten?
The GCCF (Governing Council of the Cat Fancy) recommends that new breeders join a breed club, find an experienced mentor, and study their chosen breed’s health issues before producing a single litter.
Registering with a recognized body like the CFA (Cat Fanciers’ Association) or TICA (The International Cat Association) adds credibility to your breeding program and gives buyers confidence that your kittens come from tested, documented lines. If you’re serious about becoming a registered cat breeder, start there.
When Can Cats Start Breeding?
Most cats reach sexual maturity between 5 and 9 months of age, but responsible breeders wait until the queen is at least 10 to 15 months old before her first mating. This allows her body to fully develop and gives time to complete all required health screenings, including FeLV, FIV, and breed-specific genetic tests.
Understanding the Heat Cycle
Cats are seasonally polyestrous, meaning they cycle in and out of heat repeatedly during breeding season (typically January through late autumn in the Northern Hemisphere). Indoor cats with consistent artificial lighting may cycle year-round.
According to VCA Animal Hospitals, the feline estrous cycle has four stages:
The Feline Estrous Cycle
Understanding each stage of your queen’s heat cycle
Proestrus
The queen becomes more affectionate but won’t yet accept the male. You may notice rubbing, increased vocalization, and restlessness.
Not Ready to MateEstrus (Active Heat)
The queen calls loudly, rolls on the floor, and assumes the lordosis position (crouching with hind end raised and tail to the side) when touched near the base of her spine.
Ready to MateInterestrus
If the queen doesn’t mate, she exits heat temporarily before cycling back.
Resting PhaseAnestrus
The non-cycling dormant period triggered by shorter daylight hours.
Dormant SeasonUnlike dogs, cats do not bleed during their heat cycle. The behavioral signs are the primary indicators. If your queen is calling loudly, treading her back feet, and holding her tail to one side, she’s in active estrus and ready to mate.
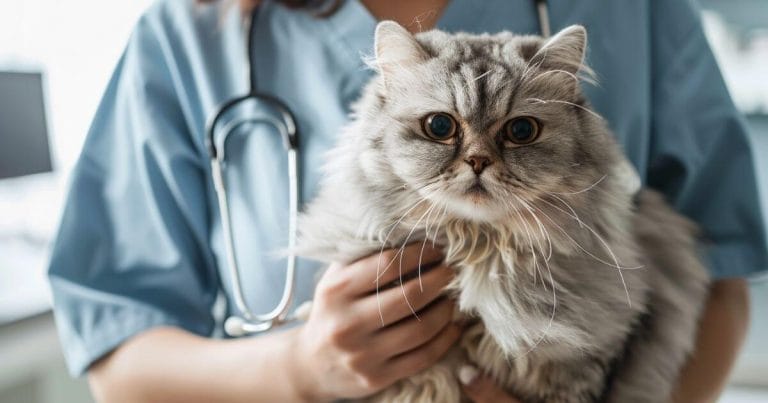
What Health Tests Do Cats Need Before Breeding?
Before breeding, all cats must be tested for FeLV (Feline Leukemia Virus) and FIV (Feline Immunodeficiency Virus), with a 60-day retest protocol recommended by the AAFP (American Association of Feline Practitioners) for any new cat entering your breeding program. Additional screening includes HCM echocardiograms, PKD ultrasounds for at-risk breeds, and breed-specific genetic panels.
Core Testing Requirements
FeLV and FIV screening is non-negotiable. Both viruses can be transmitted from queen to kittens during pregnancy or nursing. According to VCA Animal Hospitals, the testing protocol works like this:
- Run a point-of-care (POC) test on both the queen and the tom
- If either cat is new to your program, quarantine and retest after 60 days
- Any positive result means that cat should not be bred
Cat Breeding Health Tests
Required and breed-specific screenings before mating
Required for All Cats
- FeLV TestBlood test
- FIV TestBlood test
- Blood TypeType A, B, or AB
- FVRCP VaccinationUp to date
- Rabies VaccinationUp to date
- DewormingCurrent
Breed-Specific Tests
- HCM EchocardiogramMaine Coons, Ragdolls, Persians
- PKD UltrasoundPersians, related breeds
- PRA DNA TestAbyssinians, Somalis
- SMA DNA TestMaine Coons
- Pyruvate KinaseAbyssinians, Somalis
Blood type testing is critical and often overlooked. Cats have three blood types: A, B, and AB. If a Type B queen mates with a Type A tom, the kittens may develop neonatal isoerythrolysis, a potentially fatal condition where the mother’s antibodies attack the kittens’ red blood cells through her colostrum. Breeds with higher Type B frequency include Persians, British Shorthairs, Devon Rex, and Birmans.
Blood Type Warning: If a Type B queen mates with a Type A tom, the kittens may develop neonatal isoerythrolysis—a potentially fatal condition. Always blood type before breeding.
Breed-specific genetic testing varies by breed. Common screenings include:
- HCM (Hypertrophic Cardiomyopathy) echocardiogram for Maine Coons, Ragdolls, and Persians
- PKD (Polycystic Kidney Disease) ultrasound for Persians and related breeds
- PRA (Progressive Retinal Atrophy) DNA test for Abyssinians and Somalis
For a deeper dive into feline genetic screening, see our guide on cat DNA testing before breeding.
Make sure both cats are up to date on vaccinations (FVRCP and rabies at minimum) and have been dewormed. Your vet can also check for any structural issues that could complicate pregnancy or delivery.
How Do Cats Mate?
Cats are induced ovulators, meaning the queen releases eggs only after mating occurs. The physical act of mating stimulates the release of GnRH from the hypothalamus, which triggers a surge of luteinizing hormone (LH) that causes ovulation. Most queens need 3 to 4 matings within 24 hours to reliably trigger ovulation and conception.
The Mating Process
When the queen is in active estrus, she’ll signal readiness by assuming the lordosis position: crouching low with her hind end elevated and her tail swept to one side. The tom approaches, grips the scruff of her neck with his teeth, and mounts.
The actual mating lasts only 30 seconds to a few minutes. According to VCA Animal Hospitals, the queen will typically cry out and swat at the male immediately after mating. This is completely normal behavior triggered by the male’s barbed reproductive organ, which stimulates the ovulation reflex during withdrawal.
What to Expect During Mating
- Vocalization is normal. The queen will yowl, hiss, and possibly swat at the tom after each mating. This is not a sign of injury.
- Multiple matings are needed. Allow 3 to 4 matings over 24 hours for the best chance of ovulation. Some breeders allow matings over 2 to 3 days.
- Supervise but don’t interfere. Stay nearby to monitor for genuine aggression (sustained fighting, blood, or either cat trying to flee) but don’t interrupt normal mating behavior.
- Separate after mating sessions. Give the queen rest periods between matings. Keep the pair separated overnight if breeding over multiple days.
What Happens During Cat Pregnancy Week by Week?
Cat pregnancy (gestation) lasts 63 to 65 days on average, though healthy deliveries can occur anywhere from day 58 to day 72. The pregnancy divides into three roughly equal trimesters, each with distinct physical and behavioral changes you should monitor closely.
Cat Pregnancy Timeline
Key milestones from conception to birth (63-65 days)
First Trimester (Days 1 to 21)
The earliest visible sign is “pinking up,” where the queen’s nipples become noticeably pinker and slightly swollen around day 14 to 16. You may notice a mild increase in appetite, but most queens show few outward signs during this stage.
Have your vet confirm the pregnancy with an ultrasound around day 18 to 21. This also helps estimate litter size, which is important for planning the birth.
Second Trimester (Days 22 to 42)
The belly becomes visibly rounder by week 4. The queen’s appetite increases significantly, and according to PetMD, you should begin transitioning her to a high-quality kitten food, which provides the extra calories and nutrients she needs.
Behavioral changes also appear: the queen may become calmer, more affectionate, and prefer quieter areas of the home. Some queens become more withdrawn. Both are normal.
Third Trimester (Days 43 to 65)
The belly swells noticeably. You may see and feel kittens moving inside. The queen will eat 25 to 50% more than her normal intake and begin exploring quiet, enclosed spaces for nesting.
In the final week, watch for:
- Nesting behavior (pawing at blankets, seeking enclosed spaces)
- Decreased appetite 12 to 24 hours before labor
- Nipples producing small amounts of milk
- Increased licking of the belly and vulva area
- Drop in body temperature below 100°F (37.8°C) within 24 hours of labor
Nutrition During Pregnancy and Nursing
Proper nutrition during pregnancy and nursing directly affects kitten health and the queen’s recovery. The energy demands on a pregnant and nursing queen are far higher than most new breeders expect.
During pregnancy, gradually increase the queen’s food intake by 25 to 50% over her normal amount, using a high-quality kitten formula (not adult cat food). Kitten food has the higher protein, fat, and calcium content that pregnant queens need. According to Purina, the queen’s caloric needs peak during the final trimester and early nursing.
During nursing, a queen may eat 2 to 3 times her normal amount. Keep food available at all times (free-feeding) since she needs the extra calories to produce milk for the entire litter. Fresh water should always be accessible.
Avoid supplements unless your vet specifically recommends them. Over-supplementing calcium, for example, can actually cause eclampsia (a dangerous drop in blood calcium during nursing).
How Should You Prepare for Queening?
Prepare a quiet, warm queening box (at least 16 by 24 inches for most breeds) lined with clean towels or puppy pads, and place it in a low-traffic room at least 2 weeks before the expected due date. This gives the queen time to settle in and accept the space as her birthing area.
Setting Up the Queening Area
Choose a room that is:
- Quiet and away from household traffic, other pets, and children
- Warm (keep the room at 72 to 75°F / 22 to 24°C)
- Easy to clean (avoid carpeted rooms if possible)
- Accessible to you for monitoring but private for the queen
The queening box should have sides high enough to keep kittens contained (about 6 to 8 inches) but low enough for the queen to step in and out easily. A large sturdy cardboard box with one side cut down works well.
Emergency Supplies Checklist
- Clean towels and washcloths (plenty of them)
- Sterile scissors and dental floss (for cutting umbilical cords if the queen doesn’t)
- Iodine solution (for treating cord stumps)
- Bulb syringe (for clearing fluid from kitten airways)
- Kitten milk replacer and small nursing bottles (in case the queen can’t nurse)
- Heating pad set to low (kittens can’t regulate body temperature)
- Your vet’s emergency phone number and the nearest 24-hour animal hospital
When to Call the Vet
Contact your veterinarian immediately if:
- The queen has been in active labor for more than an hour without producing a kitten
- More than 2 hours pass between kittens (and you know more are coming)
- The queen is straining hard but nothing is happening
- You see green or black discharge before the first kitten arrives
- A kitten is stuck in the birth canal
Dystocia (difficult birth) occurs in roughly 3 to 6% of cat deliveries according to veterinary estimates. Having your vet’s number ready is not optional.
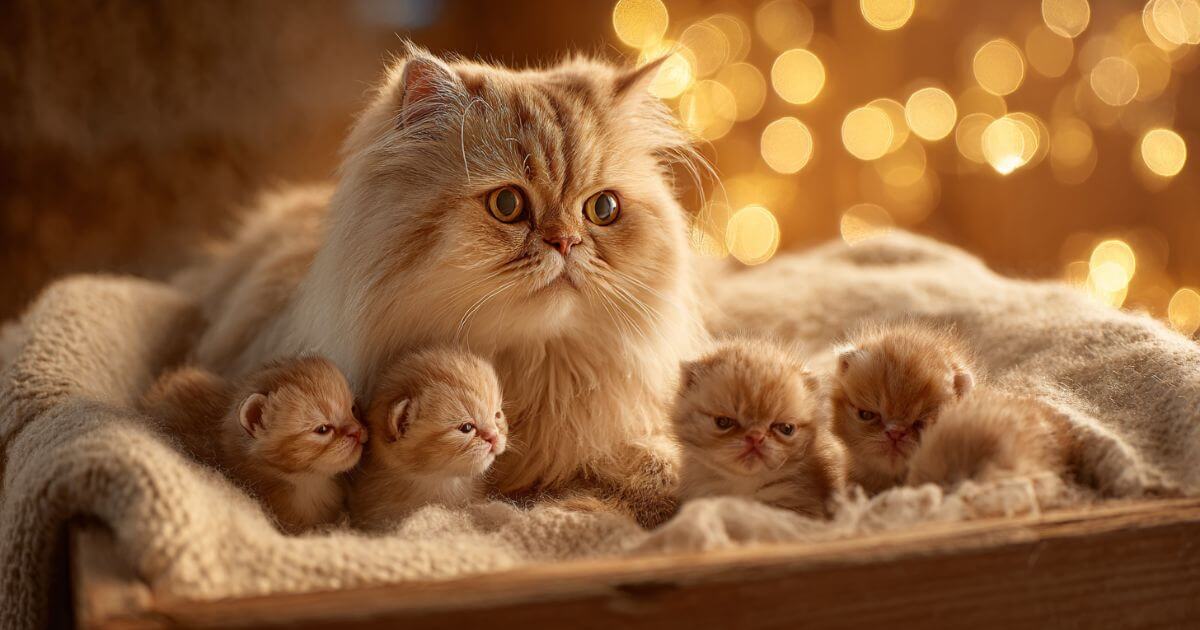
Caring for Newborn Kittens
The first 48 hours after birth are the most critical for kitten survival. Your primary job is to make sure every kitten nurses, stays warm, and is gaining weight.
The Colostrum Window
According to Cats Protection UK, kittens must nurse within the first 2 hours of birth to receive colostrum, the antibody-rich first milk that provides passive immunity against disease. After roughly 24 hours, the kitten’s gut can no longer absorb these antibodies.
If a kitten isn’t nursing within the first few hours, gently guide it to a nipple. If the queen refuses to nurse or can’t produce milk, begin supplementing with kitten milk replacer immediately and contact your vet.
Daily Monitoring
For the first 2 weeks, weigh each kitten daily at the same time. Healthy kittens gain 10 to 15 grams per day. According to International Cat Care, any kitten that fails to gain weight for 2 consecutive days or loses weight needs veterinary attention.
Kitten Development Milestones
Critical stages in the first 3 weeks of life
Sleep & Eat
Kittens should eat or sleep 90% of the time. Continuous crying means something is wrong.
Eyes Begin Opening
This process takes 2 to 3 days for both eyes to fully open. Avoid bright lights.
Ears Open
Ear canals open. Kittens begin responding to sounds around them.
Walking & Teeth
Kittens start walking (wobbly at first). Baby teeth begin emerging.
Watch for signs of fading kitten syndrome, where a seemingly healthy kitten rapidly declines. Symptoms include lethargy, constant crying, failure to nurse, and cold body temperature. This is a veterinary emergency.
When Should You Wean Kittens?
Begin introducing solid food at 3 to 4 weeks of age, starting with a slurry of wet kitten food mixed with warm water or kitten milk replacer. Most kittens are fully weaned by 6 to 7 weeks, but they should stay with their mother and littermates until at least 8 weeks for proper socialization and immune system development.
The Weaning Process
According to PetMD, follow this gradual transition:
Kitten Weaning Timeline
Gradual transition from nursing to solid food
Introduction
Offer a shallow dish of wet kitten food mixed into a soupy consistency. Expect more mess than eating at first. The queen will still nurse frequently.
Thickening
Thicken the food mixture. Kittens should be eating small amounts of solid food alongside nursing. Offer food 4 to 5 times per day.
Adding Kibble
Introduce dry kitten kibble alongside wet food. You can moisten the kibble with warm water or kitten milk replacer to soften it.
Independence
Most kittens are eating solid food independently. The queen will naturally reduce nursing, and her milk production will decrease.
Fully Weaned
Kittens should be fully weaned and eating solid kitten food exclusively. This is the earliest safe age to rehome kittens, though many breeders wait until 12 to 14 weeks.
Socialization During Weaning
The 3 to 8 week window is critical for kitten socialization. Kittens learn from their mother and siblings during this period, including bite inhibition, play behavior, and litter box habits. Removing kittens before 8 weeks often leads to behavioral problems in their new homes.
Handle kittens gently and frequently from week 3 onward. Expose them to normal household sounds, different people, and gentle handling to build confidence.
Conclusion
Breeding cats responsibly is a commitment that starts long before two cats meet and continues until every kitten is healthy, socialized, and placed in a good home. Here are the essentials to remember:
- Test for FeLV, FIV, and breed-specific conditions before any mating
- Wait until the queen is at least 10 to 15 months old
- Expect 63 to 65 days of pregnancy with increasing nutritional demands
- Prepare your queening area at least 2 weeks before the due date
- Ensure kittens nurse colostrum within 2 hours of birth
- Begin weaning at 3 to 4 weeks, and don’t rehome before 8 weeks
Ready to find a verified, health-tested breeding partner for your cat? Browse breeding cats on PairMyPet or visit our complete breeding guide for step-by-step support through the entire process.
Frequently Asked Questions
The average litter size is 4 to 6 kittens, though litters can range from 1 to 12 depending on the breed, the queen’s age, and her overall health. First-time mothers and older queens tend to have smaller litters. Breeds like Siamese and Burmese often produce larger litters, while Persians typically have smaller ones.
Technically yes, but responsible breeders don’t. A cat’s first heat can occur as early as 4 to 5 months, when her body is still growing. Breeding this young increases the risk of pregnancy complications, smaller litters, and long-term health issues for the queen. Wait until she is at least 10 to 15 months old and has passed all health screenings.
Most responsible breeders limit queens to one litter per year, allowing the mother’s body to fully recover between pregnancies. Some registries and breed clubs set specific limits. The GCCF, for example, won’t register litters from queens who have had more than 3 litters in 2 years. Breeding a queen every heat cycle without rest periods shortens her healthy lifespan.
Registration isn’t legally required in most regions, but it’s strongly recommended. Registering with the CFA, TICA, or a national registry like the GCCF gives your breeding program credibility, access to breed health data, and the ability to provide pedigree documentation to kitten buyers. Most serious buyers expect registered kittens with documented lineage.
Expect to spend $1,500 to $3,000 or more per litter on health testing (FeLV/FIV, genetic panels, blood typing), veterinary checkups during pregnancy, emergency preparedness, quality nutrition, kitten vaccinations, and microchipping. If complications arise during birth and a cesarean section is needed, that alone can cost $1,500 to $3,000. First-time breeders should have at least $5,000 set aside before their first mating.
Find Health-Tested Breeding Partners
PairMyPet connects responsible breeders with health-tested, verified breeding partners. Search by breed, location, and health certifications.
Start Your Search